Strong adhesion is the foundation of successful overmolding. No matter how advanced the materials or how precise the tooling, poor adhesion between the substrate and the overmold material will lead to delamination, functional failure, and product returns.
Designing for strong adhesion in overmolding is not a single decision—it is a system-level approach that involves material compatibility, part geometry, surface condition, mold design, and process parameters.
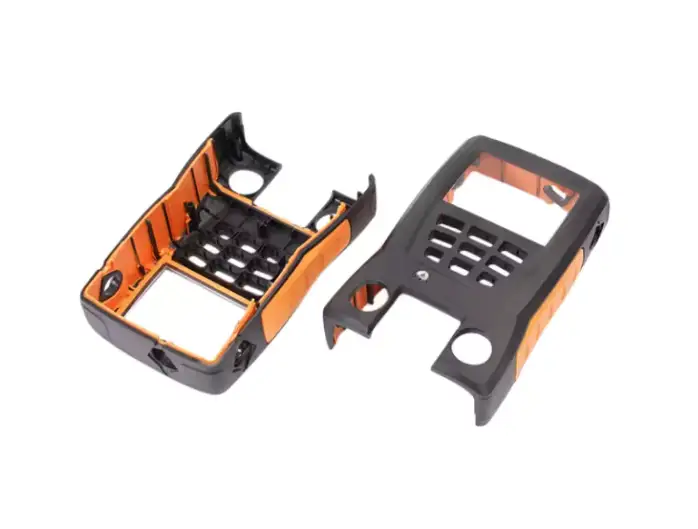
This article provides a practical, engineering-focused guide to achieving reliable adhesion in overmolding projects across automotive, medical, electronics, and industrial applications.
Why Adhesion Matters in Overmolding
Overmolding is used to combine materials with different properties into one integrated part. Typical goals include:
- Adding grip or soft-touch surfaces
- Improving sealing and moisture resistance
- Enhancing shock absorption
- Providing electrical insulation
All of these functions depend on stable adhesion between layers. When adhesion fails, common issues include:
- Peeling or delamination
- Water or dust ingress
- Reduced mechanical strength
- Cosmetic defects
Strong adhesion ensures the overmolded part performs as designed throughout its service life.
Understanding Adhesion Mechanisms in Overmolding
Before designing for adhesion, it is important to understand how bonding actually occurs.
Chemical Adhesion
Chemical adhesion happens when the overmold material partially melts or diffuses into the surface of the substrate, forming a molecular bond during injection.
Key conditions for chemical adhesion:
- Compatible polymer chemistry
- Proper melt temperature
- Clean substrate surface
- Adequate contact pressure
Chemical bonding offers the highest adhesion strength and is preferred whenever possible.
Mechanical Adhesion
Mechanical adhesion relies on physical interlocking rather than molecular bonding. The overmold material flows into features on the substrate and locks in place after cooling.
Common mechanical features include:
- Undercuts
- Through-holes
- Grooves
- Knurling or texture
Mechanical adhesion is essential when materials are chemically incompatible.
Combined Adhesion Strategy
Most robust overmolding designs use both chemical and mechanical adhesion. Chemical bonding provides baseline strength, while mechanical features act as a safety backup under stress or environmental exposure.
Material Selection for Strong Overmolding Adhesion
Material compatibility is the single most important factor in adhesion performance.
Choosing a Compatible Substrate
Common overmolding substrates include:
- ABS
- Polycarbonate (PC)
- Nylon (PA)
- Polypropylene (PP)
Each substrate interacts differently with elastomers and soft plastics.
Selecting the Right Overmold Material
Overmold materials must be chosen specifically for adhesion performance, not just softness.
Common overmold materials include:
- TPE (styrenic, olefinic, polyester-based)
- TPU
- Silicone and LSR (typically mechanical bonding only)
Some TPE grades are formulated to bond directly to ABS, PC, or nylon without adhesives.
Material Compatibility Testing
Never rely on assumptions. Material compatibility should be verified through:
- Peel tests
- Shear tests
- Environmental aging tests
Early testing prevents expensive tooling rework.
Designing Part Geometry for Adhesion Strength
Part design plays a critical role in adhesion reliability.
Add Mechanical Locking Features
When in doubt, add mechanical support.
Effective design features include:
- Dovetail undercuts
- Through-holes that allow overmold flow
- Circumferential grooves for rotational resistance
These features distribute stress and prevent peel forces.
Avoid Sharp Transitions
Sharp corners create stress concentration points that can initiate delamination.
Best practices:
- Use generous fillets
- Gradual thickness transitions
- Rounded edges at material interfaces
Control Overmold Thickness
Overmold layers that are too thin may peel, while layers that are too thick may shrink unevenly.
Aim for consistent thickness to maintain uniform adhesion and cooling.
Surface Preparation for Improved Adhesion
Even compatible materials can fail to bond if surface conditions are poor.
Keep the Substrate Clean
Avoid:
- Mold release agents
- Oils or dust
- Fingerprints during handling
Contamination reduces chemical bonding strength.
Surface Texture and Roughness
A controlled surface texture improves mechanical adhesion and increases bonding area.
However, excessive roughness can trap air and weaken the bond.
Surface Treatment Methods
For difficult materials, surface treatments may be required:
- Plasma treatment
- Corona discharge
- Flame treatment
These methods increase surface energy and improve wetting of the overmold material.
Mold Design Considerations for Adhesion
Mold design directly affects bonding quality.
Accurate Part Alignment
Misalignment between the substrate and overmold cavity can result in:
- Thin bonding areas
- Incomplete coverage
- Weak adhesion zones
Precision tooling is essential.
Gate Location and Flow Direction
Material should flow toward bonding areas, not away from them.
Proper gate placement:
- Reduces weld lines at the interface
- Improves pressure at bonding zones
Venting and Air Traps
Trapped air prevents full contact between materials.
Well-designed venting ensures the overmold fully wets the substrate surface.
Process Parameters That Affect Adhesion
Even perfect design can fail if process settings are wrong.
Melt Temperature
- Too low: poor wetting and weak bonding
- Too high: material degradation
Optimal temperature ensures good surface diffusion.
Injection Pressure and Speed
Sufficient pressure is required to push the overmold material into fine features and achieve intimate contact.
Mold Temperature Control
A warmer substrate surface improves chemical bonding by preventing premature cooling.
Testing Adhesion Strength in Overmolding
Adhesion should always be validated, not assumed.
Common Test Methods
- Peel strength testing
- Shear testing
- Pull-off testing
Environmental and Aging Tests
Test parts under:
- Heat cycling
- Humidity exposure
- Chemical contact
This ensures long-term adhesion performance.
Common Adhesion Problems and How to Fix Them
Delamination After Cooling
Often caused by:
- Incompatible materials
- Insufficient temperature
Solution: material re-selection or process optimization.
Adhesion Failure After Aging
Often due to:
- Thermal expansion mismatch
- Environmental stress
Solution: mechanical locking and material matching.
Localized Bond Failure
Caused by:
- Poor flow or venting
- Gate location issues
Solution: mold design adjustment.
Industry-Specific Adhesion Requirements
Medical Devices
- Clean surfaces
- Validated bonding strength
- Biocompatible materials
Automotive Applications
- Resistance to heat and vibration
- Long-term durability
Electronics
- Moisture sealing
- Electrical insulation reliability
Best Practices for Designing Strong Adhesion in Overmolding
- Start with compatible materials
- Design mechanical locking features early
- Control surface cleanliness
- Optimize mold and process parameters
- Validate with real testing
Strong adhesion is achieved through design discipline, not trial and error.
Conclusion: Adhesion Is a Design Decision, Not an Afterthought
Designing for strong adhesion in overmolding requires coordination between material selection, part geometry, tooling design, and process control. When adhesion is considered early in the design phase, overmolding becomes a reliable, high-performance manufacturing solution rather than a risk.
By applying proven design rules and validating assumptions through testing, manufacturers can produce overmolded parts that maintain integrity, appearance, and function throughout their entire lifecycle.